good morning ladies! Do you want to learn to make a mini out of stuff on hand? perfect! all you'll need extra is some little paper bags. the kind used for lunches.
the rest Im sure you already have on hand,
ribbon,hole punch,glue,scissors,paper,embellishments.
this is fun and interesting sort of mini! it will leave with pages to scrap on and pockets to fill!
lets get started!
1~gather supplies
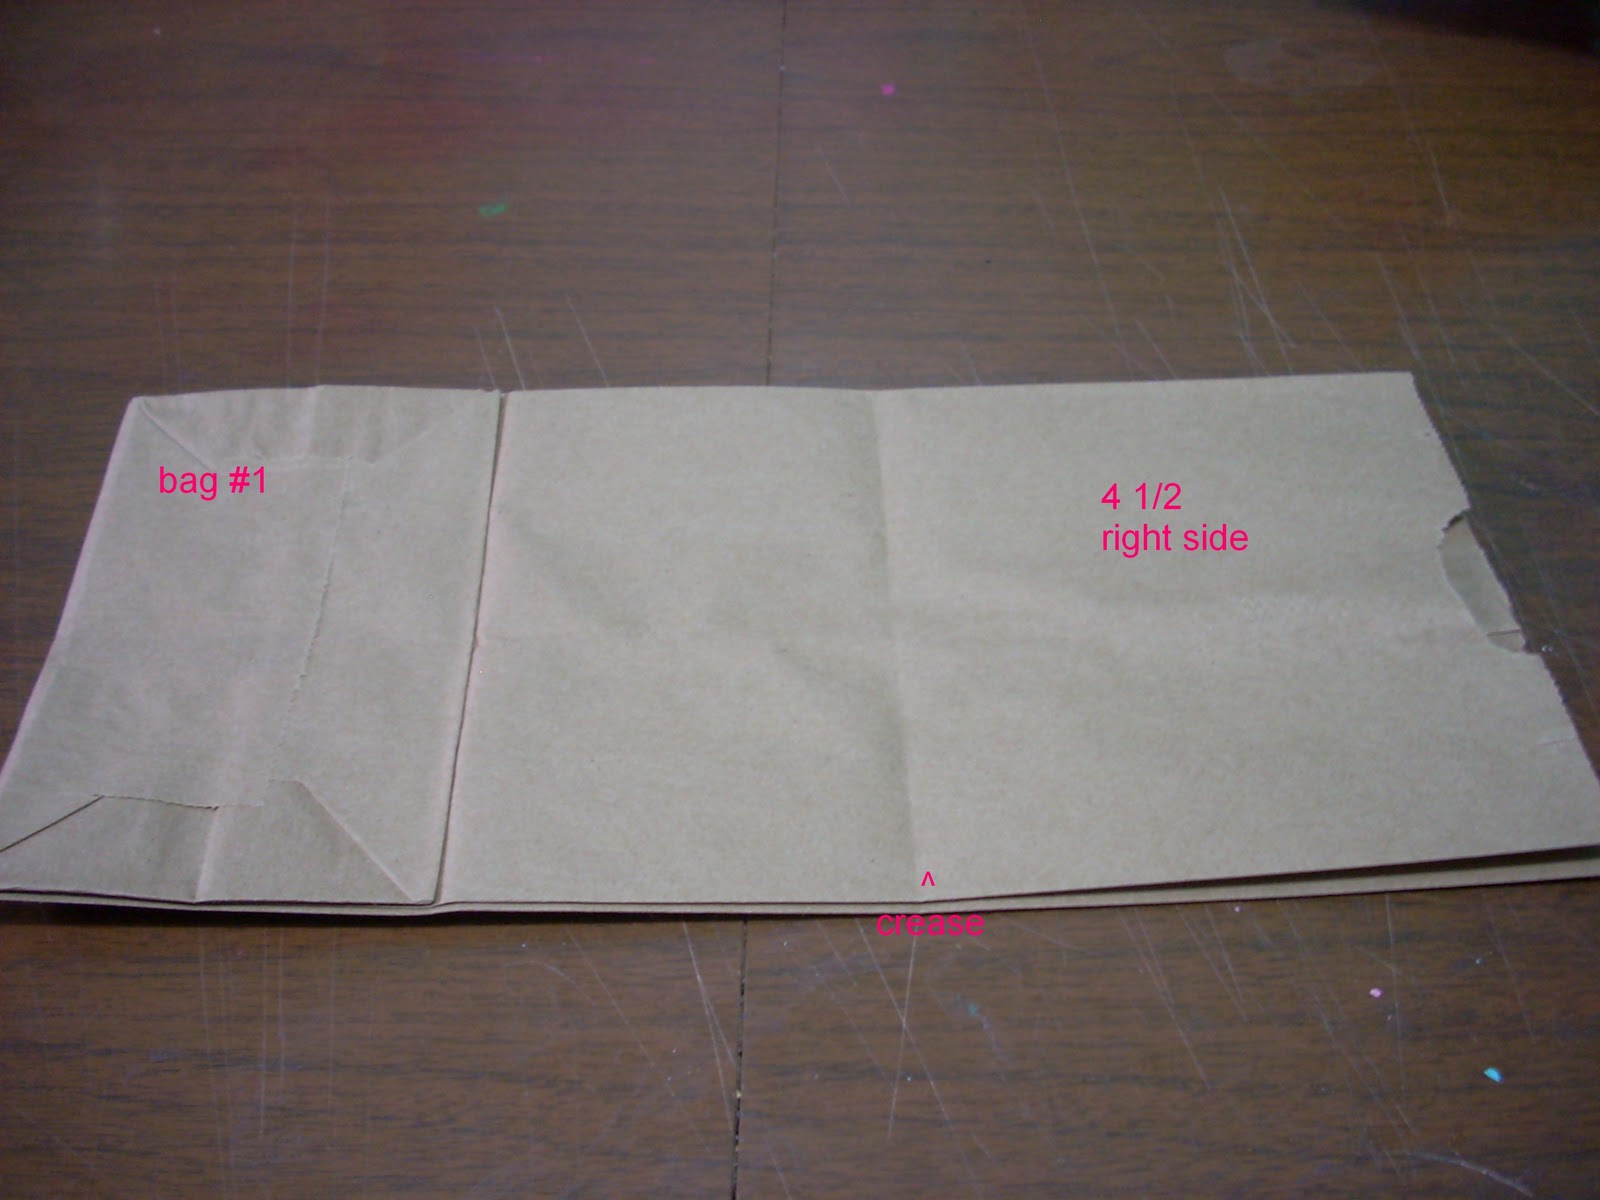
2~ grab a bag to start with, this will now turn into bag 1. place bag bottom side up and shown in the pic. make a fold in the bag as shown by foldin the right side over the left. this should leave you with a 4 1/2 in right side.
3~ repeat for bag 2. only this thime you want your right side to be 4in.
4~ for bag #3 we will start with the bag facing the opposite way. place the end of the bag on the right.
you will crease the same way and the right page should now be 6 1/2 in.
5~when assembling the bags will go as follow. lay down 1, then 2 on top the 3. all laid down the same way as when you folded them.
6~ this is how will appear assembled and open.
7~I also wanted to mention the bottoms of the bags.
I choose to make these into pages, but that is completly up to you. you cover the paper onto your bag in any manner you choose. should you decide to make them into pages it will appear like this.
8~now that you know how your book is going to go, lets start adding paper.
continue adding paper till your done.
(remember to keep the pages in order)
9~once this is complete. punch two holes, making sure you are going thru all the pages. then thread ribbon and tie.
10~you are now free to embellish your mini in any way you desire! dont forget to add stuff to the fun pockets inside!!!
I hope you all enjoy this easy mini made with stuff on hand! please share pics if you make this! we would love to see your interpretations!
love,
val


Great tutorial, I have ti try it!! Thanks for sharing!
ReplyDeleteI will have to try this one! Thanks Val!
ReplyDeletecan't wait to try this!!! thanks val :)
ReplyDeleteVal thanks for the tutorial the MA is beautiful I love the papers you use ;)
ReplyDeleteHugs
Gracias esta genial
ReplyDelete